SharePoint offers seamless collaboration, document management, and integration capabilities for teams and organizations. Whether you’re managing a small team project or setting up an intranet for an enterprise, creating a SharePoint site can streamline your workflows and improve productivity.
This guide provides a detailed, step-by-step process to help you create a SharePoint site and customize it to meet your specific needs, from initial setup through ongoing governance. Learn how to create a SharePoint site tailored to your requirements and optimize its features for your team or organization.
Step 1: Decide on the Purpose of Your SharePoint Site
Before creating a SharePoint site, it is vital to identify its principal goals & information architecture planning. There are two main categories of sites that can be created in SharePoint:
Team Site: Designed for internal collaboration among a group of people. It is used for document sharing, task tracking, and real-time collaboration. This option is suitable for a group of people who are working together in the same company or organization.
Communication Site: Primarily for broadcasting information to a wider audience, such as announcements, portals, reports, or corporate updates.
Step 2: Access SharePoint Online
To get started, log in to your Microsoft 365 account.
Navigate to the App Launcher (the waffle/grid icon in the upper-left corner of the Microsoft 365 portal). The 2026 App Launcher showcases a streamlined design that highlights your most-used cloud productivity tools, surfacing recently opened apps and sites so you spend less time hunting through menus.
Click on SharePoint from the list of available apps. This will take you directly to your personalized SharePoint home interface, displaying your frequent sites, news, and followed pages.
If you’re unable to find the icon, consult your administrator to confirm whether your account has the correct license and permissions to access the platform. For a broader look at what a Microsoft 365 license unlocks across apps, see our guide to Microsoft 365 licensing basics.
Step 3: Create a New SharePoint Site
Once you are on the SharePoint home page:
Click on “Create site” (this button is situated in the top-left corner of your SharePoint dashboard).
Choose the Site Type: Select either a Team Site or a Communication Site based on your goals.
Use Site Templates: Rather than starting from a completely blank canvas, you can select from various pre-built layout models. If your organization uses employee experience platforms, you can access specialized site templates from Microsoft Viva designed for internal communications, onboarding hubs, and corporate news. Starting from a template also keeps branding and page structure consistent across departments, which saves rework later.
Enter Site Information: Input your site name, a brief description, and choose your privacy settings (Public or Private).
Click “Next” to let SharePoint provision your site in a few seconds.
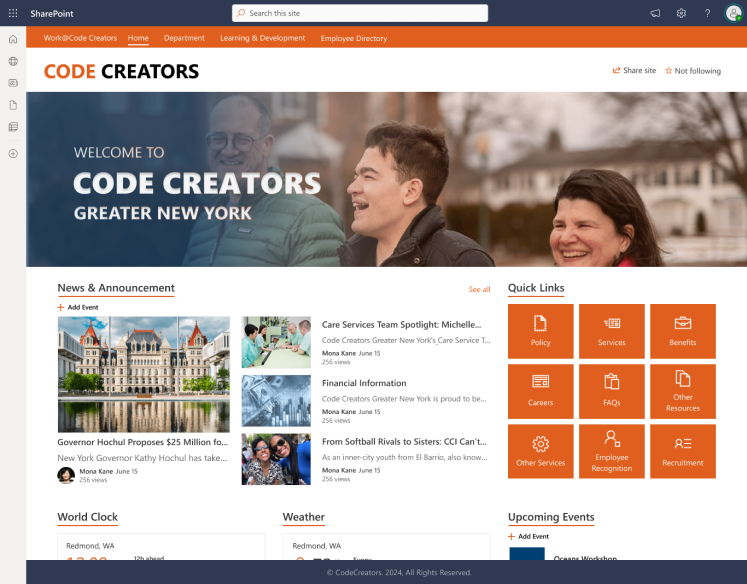
Step 4: Add Members and Set Permissions
After setting up the site, you can invite other team members and distribute the correct level of access.
Understanding Permission Levels
To protect your files, you must assign concrete permissions properly:
- Site Owner (Full Control): Has complete administrative rights to change site themes, edit navigation, and grant access to others.
- Site Member (Edit): Can view, add, modify, delete, and edit files, pages, and list items.
- Site Visitor (Read-Only): Can view and download files or read pages but cannot make any changes.
Groups vs. Individual Permissions
For a small project team, assigning individual user permissions is quick and easy. However, for large organizations, you should always assign permissions using Microsoft 365 Groups or security groups. This ensures that when a new employee joins a department, they automatically receive correct access without manual IT intervention, and it makes offboarding faster since removing someone from a group revokes access everywhere at once. Our guide to managing Microsoft 365 Groups covers how to set this up at scale.
External Sharing Risks & Best Practices
External sharing allows you to collaborate with partners, vendors, or clients outside your organization. While highly convenient, it introduces data leak risks. Always enforce the “least privilege” rule, set links to expire after a specific period, and block external sharing on highly sensitive document libraries.
Step 5: Customize Your SharePoint Site
SharePoint sites are highly flexible solutions. You can easily personalize your design through the settings menu:
- Change the Site Theme: Click the Settings (gear icon) > Change the look > Theme to adjust colors and fonts.
- Add a Logo: Upload your company logo via Settings > Site Information.
- Add Web Parts: Click Edit on your homepage, then select the “+” icon to insert flexible web parts like document libraries, calendars, or news feeds. Keep your layouts clean and uncluttered to make it easy for your team to find information.
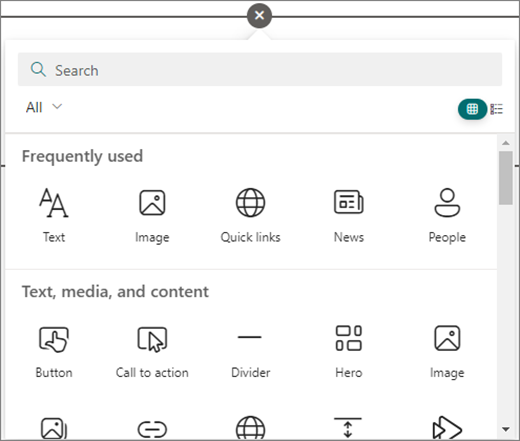
Step 6: Create Document Libraries & Apply Sensitivity Labels
Libraries are required in SharePoint to manage files, reports, and documents on your site.
- Add a Document Library: Click + New > Document Library. Provide a name and configure your version control parameters.
- Apply Sensitivity Labels: You can protect your intellectual property by applying security tags directly to your document libraries or lists. Using Microsoft Purview, simply classify a library as “Confidential” to automatically encrypt your files, restrict copying, and block external sharing.
- Organize Files: Create logical folder structures and utilize metadata columns to classify files (e.g., Department, Document Type, or Review Date) instead of relying entirely on deep folders.
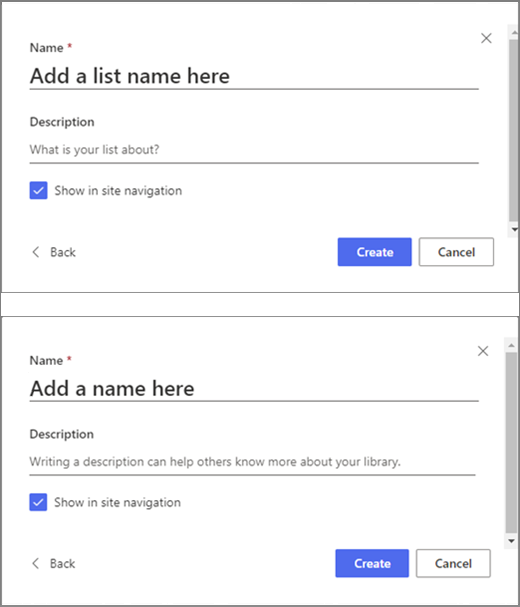
Step 7: Set Up Lists & Automate Processes
Lists are employed for arranging and administering data in an orderly manner. They can be used for tracking projects, managing inventories, or logging customer support issues. If you are new to this feature and want to learn how to design one from scratch, our comprehensive guide on how to make SharePoint lists walks you through the entire process step-by-step.
Create a List: Click + New > List and select a blank list or use an out-of-the-box template.
Customize Columns: Add fields for specific data types like choice menus, dates, or numbers.
Automate Workflows (Practical Example): Instead of manually checking lists, you can build automated workflows using Power Automate. For example, you can set up a workflow that triggers an automatic email alert to a manager whenever a new row is added to an “Invoice Tracker” list, requesting their approval. You could extend this further by having the workflow update a “Status” column to “Approved” or “Rejected” once the manager responds, so the whole team can see progress without opening a separate app.

Step 8: Configure Site Navigation
A well-organized navigation system ensures users can easily find what they are looking for.
Edit the Navigation Bar
Click Edit on your left-hand menu (for Team Sites) or top navigation menu (for Communication Sites) to add, remove, or drag-and-drop links to your pages, libraries, or external websites.
Use Hub Sites for Multi-Site Organizations
Hub Sites are designed for organizations with multiple SharePoint sites that need unified search, shared branding, and a common navigation structure. If you have several department sites, connecting them to a central SharePoint Hub Site automatically syncs their navigation bars and search capabilities. SharePoint site architecture best practices play’s important role in hub sites’ association and permissions.
Step 9: Enable Sharing, Collaboration, & Viva Integration
SharePoint makes communication simple through modern integration points.
Microsoft Teams Integration
When users create a Microsoft Teams channel, SharePoint automatically creates a connected site behind the scenes to store all files shared in that channel. This integration is designed to enhance communication and collaboration, ensuring that your team’s chats and documents remain synced in real-time while eliminating the need to search through separate systems. In practice, this means a file uploaded in a Teams conversation shows up in the matching SharePoint library moments later, so there’s a single, reliable copy of every document regardless of where someone opens it from.
Microsoft Viva Integration
To maximize employee engagement, you can connect your SharePoint site to Microsoft Viva. This pulls your company announcements, resources, and intranet pages directly into the Viva Connections dashboard, allowing employees to access your corporate portal without leaving their daily workspace. Our guide on setting up Viva Connections shows how to configure the dashboard and cards for your organization.
Step 10: Optimize Site Performance with AI
To keep your SharePoint site running smoothly, use these optimization strategies:
Advanced Search with AI: You can optimize the search bar by leveraging SharePoint’s AI-powered search to index your files, images, and pages. It understands natural language queries and looks at your working relationships to suggest the most relevant files at the top of your search results, so people spend less time scrolling through irrelevant matches.
Copilot Integration for Site Setup: You can leverage Microsoft Copilot as an intelligent assistant to build, optimize, and organize your site. You can ask Copilot to draft a landing page layout, rewrite content in different tones, or quickly summarize massive file collections in your libraries. For teams looking to build custom AI assistants on their sites, our guide on how to enable and use Copilot in SharePoint walks you through the entire administrative setup.

Troubleshooting Common SharePoint Issues
If you run into issues while building or managing your new workspace, consult this quick troubleshooting reference to avoid common site design mistakes:
Users Cannot Access the Site: First, check your site permissions under Settings > Site permissions. Verify if the user is added to the correct Owner, Member, or Visitor group, and check if any conditional access policies are blocking their device.
Search is Not Finding Files: Ensure that search indexing is active for your library. Go to Library Settings > More library settings > Advanced settings and verify that “Allow items from this document library to appear in search results” is set to Yes. Additionally, add descriptive metadata tags to your files to improve search discoverability.
Site Performance is Slow: Having too many files in a single library view can cause lag. If your library exceeds 5,000 items, apply index columns, create filtered views, or archive old content to keep your workspace responsive. Technical departments often run into specialized bottlenecks with massive datasets or complex directories; understanding the Common SharePoint Limitations for Engineering Teams will help you structure your repositories to avoid sync failures.
Teams Sync Issues: If files are not syncing properly between Teams and SharePoint, try refreshing your web browser or restarting your Microsoft Teams app. Check your local internet connection and ensure that you are not running conflicting sync tools in the background.
Conclusion
Setting up a SharePoint site is straightforward, but getting the most out of your digital workspace requires careful planning and proper security governance. By structuring your pages, setting up secure permissions, and leveraging modern AI features, you can build a highly collaborative environment that scales as your team or organization grows.
If you’re looking for expert guidance, Code Creators is a trusted SharePoint consultant specializing in SharePoint development services. From custom site design to advanced integrations, we ensure your SharePoint solution is optimized for success. Reach out to us to get started today!